


If setting up a database feels like too many steps at once, the MySQL Database Wizard puts them in order. It asks for one thing at a time: the database name, the user, and the permissions. For a first database, it is the easiest route.
The wizard does the same work as the MySQL Databases page. The difference is that it guides you through each step on its own screen.
Step 1: Open the Wizard
- Log in to cPanel.
- In the Databases group, click MySQL Database Wizard.
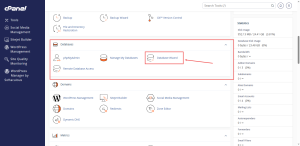
Step 2: Name the Database
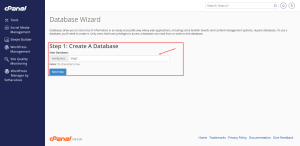
Type a short name for the database and click Next Step. Remember that cPanel adds your account name to the front, so the full name will be longer than what you type.
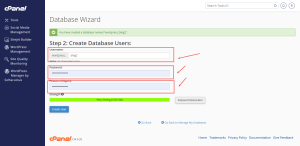
Step 3: Create the User
Enter a username and a strong password. Use the password generator if you are not sure what to choose, and save the password before you move on. Click Create User, then Next Step.
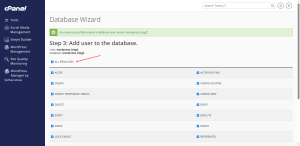
Step 4: Set the Privileges
Tick ALL PRIVILEGES to give the user full control over the database. Then click Next Step to finish.
Check the Result
When the wizard finishes, open the MySQL Databases page and look for your new database and user in the lists. Both should appear, and the user should be linked to the database.
If the list looks wrong, you can fix it on the MySQL Databases page without starting over.
When to Use Each Tool
Use the wizard for a new database. Use the MySQL Databases page for changes to an existing setup, such as adding a second user or removing a database. Both tools reach the same database system.
Planning a site that needs several databases? A cPanel shared hosting plan from HoganHost gives you the space and tools to set them up.