Hi everyone, we will show you about how to install cPanel on CentOS 7.
What is cPanel?
cPanel, as its name implies, is a web control panel. Cpanel provides you with the ability to manage Linux based hosts. This control panel provides users with a wide range of features, and as a result, it has formed the greatest hosting control panel.
Users can create and manage their email addresses in cPanel and control domains, databases, various versions of PHP, and almost all aspects of a web server.
As a result, this powerful control panel makes it possible to manage all of your hosting services in one place. cPanel was developed by a company of the same name and in the Perl programming language.
cPanel is a great, customizable control panel, which has done well over time and has a professional and active team behind it, which is a great help to cPanel users.
The cPanel’s reputation, popularity, and widespread use are due to its simple and understandable user interface so that everyone learns only once as a result, and especially in 2021, it is used more than ever to launch a website.
Why CentOS7?
As you may know, CentOS 8 is released, but there are some problems with installing cPanel. At the moment that I write this post, CentOS 7 is the most reliable and most compatible operating system to install cPanel.
Minimum Resource Requirement To Install cPanel
- A Linux VPS with Centos 7 operating system
- 1 GB RAM
- 1 core CPU 1.1 GHz
- 20 GB Storage
- Static IPv4
Connect To Putty.
You can use the topic about how to connect to putty for more details.
Pre-requirements Of cPanel Installation
Note: Before installing, I should mention that once you copied the commands, you can paste them by right-click inside the SSH connection (Putty).
1- Update Centos 7
Use this command to update the server before installing cPanel:
yum update
You will be asked yes or not, that you should type y and press enter to proceed with the update.
2- Installing Perl
Perl is the language that cPanel has been written with.
Run the following command to make sure that Perl is installed on the server.
yum install perl
3- Installing Curl
The Curl is required to download the Cpanel installation script; the following command can install the Curl:
yum install curl
4- Add Hostname
Cpanel requests for a hostname that should be in (FQDN) Fully Qualified Domain Name format. For example, in this topic, we will use myeserver.mydomain.com, and instead of this, you should put your own hostname.
Here is the command to set it:
hostnamectl set-hostname myeserver.mydomain.com
5- Disabling Network Manager Service
Network Manager service is used to connect computers, cPanel asks to remove this service or disable it when installing cPanel.
service NetworkManager stop
chkconfig NetworkManager off
6- Installing cPanel With trial License
You can use this code to install cPanel.
cd /home && curl -o latest -L https://securedownloads.cpanel.net/latest && sh latest
Based on the resources of your server, the installation may take about an hour to 2 hours.
7- Enabling Network Manager Service
Remember to enable this service once the installation was completed with the below commands.
service NetworkManager start
chkconfig NetworkManager on
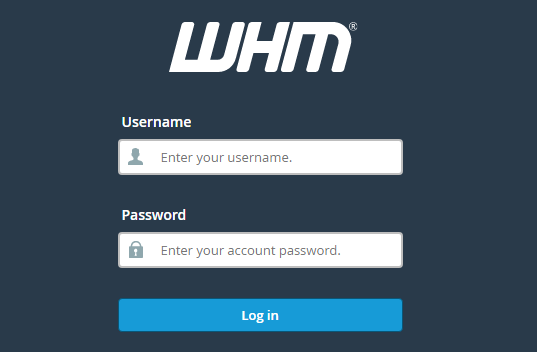
Once the installation was completed, you will face the login URL to login into WHM / Cpanel.
URL to login to the admin panel of cPanel: https://serverIP:2087 ( Consider that instead of server IP, you should put your server’s IP, which is this for me: https://48.68.149.135:2087 )
Username to log in to the admin panel of cPanel: It is the root or the username that you use instead of the root.
The password to login to the admin panel of cPanel: It is the password of your server.

Purchase, Verify And, Update The cPanel License
-
Purchase cPanel License.
You can order a cPanel license through the licenses page of cpanel website.
-
Verify the cPanel License.
If you wish to verify that your license has been activated successfully or not, you can use the cPanel verify system.
-
Update cPanel License.
Once you ordered a license, you should run this command inside your server, and as a result, the license will be updated.
/usr/local/cpanel/cpkeyclt
Be free to share your opinions and questions with us in the comments section!
Be always victorious and successful.
FAQ
- Is cPanel free?
It has a free trial for 15 days, but after that, you should order a license.
- How long does cPanel take to install?
It is related to the resources of your server. It takes about 1 to 2 hours in VPS servers, but in a dedicated server, it takes about 15 minutes.
- How do I know if cPanel is installed?
it can be checked through this command: usr/ local/cPanel/cPanel-V
- How do I access the web panel in CentOS?
The default link and port to log in to cPanel are like this: https://hostname or server IP:2087 | Instead of hostname or server IP, you should put yours.
- Who uses cPanel?
cPanel is the world’s most popular web hosting control panel, and most of the hosting companies use it, and everybody can use it on a server or shared hosting.
- How do I change the hostname in CentOS?
In the WHM panel, there is a section by the name change hostname to change the hostname.
- Do I need cPanel for WordPress?
To use WordPress, you don’t have to run it on Cpanel, and it can run on any web-server.
- How do I find my hostname in CentOS?
In your Linux server, type hostname and press enter, then you will see your hostname.


