Since WordPress is the most widely used CMS it’s installation process has been made as simple and user-friendly as possible. It can easily be installed through a control panel like cPanel or Plesk, additionally, there are many one-click installers like Softaculous which allow you to install WordPress automatically.
There are many cases, however, in which you would still prefer to install WordPress via SSH, whether you just prefer the convenience and quickness of the Linux terminal or are using a VPS hosting or Private Dedicated Server without a control panel. The following guide will help you install WordPress through SSH in a matter of few mouse clicks. If you just want to learn more about SSH and how to use it, we absolutely encourage you to do so and the following guide would be a great start.
Install WordPress via SSH
First, you need to connect to your account via SSH, you can check out our tutorials on how to connect via SSH in Windows , Mac and Linux. Once logged in via SSH use the ‘cd’ command (SSH cd Command) to navigate to the root directory of the domain you wish to install WordPress for, for example, if you want to install WordPress for your primary domain navigate to public_html.
[user@host ~]$ cd public_html
Now that you have reached the correct directory download WordPress using the ‘wget’ command. Then use the ‘tar’ command to extract the archive of WordPress.
[user@host ~]$ wget http://wordpress.org/latest.tar.gz

[user@host ~]$ tar xfz latest.tar.gz
The above commands will download the latest version of WordPress from their official website wordpress.org and will extract the WordPress core files. Please keep in mind that the core files will be extracted in a subdirectory called ‘wordpress’. Use the ‘mv’ command (SSH mv Command) to move WordPress’ files from public_html/wordpress to public_html.
This step is very important because skipping it would affect the URL of your website and instead of domain.com it would be loading domain.com/wordpress to avoid this run:
[user@host ~]$ mv wordpress/* ./
This command affects all of the files and directories under ‘/wordpress’ directory (* stands for wildcard) and moves them a directory above.
Now that the ‘/wordpress’ directory is empty and you won’t be needing the archive file any longer you can delete them with the following commands (SSH rm Command):
[user@host ~]$ rmdir ./wordpress/

[user@host ~]$ rm -f latest.tar.gz
Create a Database using SSH
The next step is to create the database and corresponding user for your installation and associate them together. This step varies depending on what kind of service you are using:
1. If you are hosted on shared hosting environment this can be done through your cPanel > MySQL® Databases > Create New Database > Add New User > Add User To Database. Make sure to provide your database user with All Privileges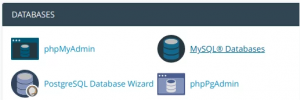
2. If you are using a Virtual Private Server or Dedicated Server where you have root privileges you can perform this step through SSH as well. First, you need to login to the MySQL command-line using the following command:
[user@host ~]$ mysql -u username -p
Then use the following command to create a new user and set its password:
mysql> create user 'dbusername'@'localhost' identified by 'password';
Now you have a database user and you can create a database and grant access to the user to that database. Use the following commands:
mysql> create database dbname;

mysql> grant usage on *.* to username@localhost identified by 'password';

mysql> grant all privileges on dbname.* to username@localhost;
That’s it – you have now successfully created a Database using SSH!
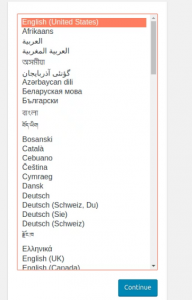
To proceed with the installation now access your domain through a web browser of your choosing (Google Chrome, Mozilla Firefox, Opera etc.) and you’ll see the WordPress installation page, it will ask you to choose a language.
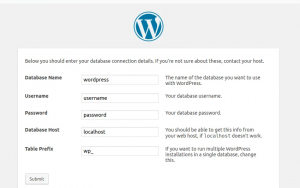
Next, you’ll see a page with the following message: “Welcome to WordPress. Before getting started, we need some information on the database. You will need to know the following items before proceeding.”. Use the database and database user you created on the previous step.
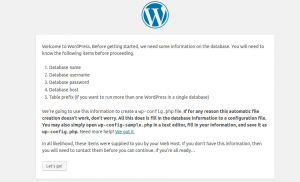
Use “localhost” as Database host and you can leave the table prefix to the default one “wp_”. Click “Submit” and choose “Run the installation” on the next page.
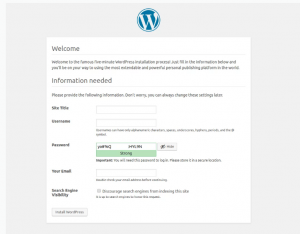
Finally, you’ll be asked to enter the administrative username, password and administrative email that you’ll be using for accessing your WordPress dashboard – domain.com/wp-admin.
Click “Install WordPress”. Then you’ll see the Success page of WordPress, click on Log In to proceed.
Use the admin username and password you’ve entered on the previous step to access your WordPress dashboard.
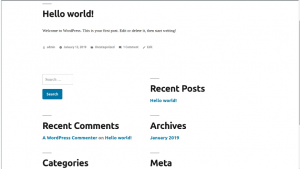
Congratulations, you have installed WordPress through SSH!
Hola, we hope this help check out our Shared hosting Hoganhost.com.ng


