Need to install the ConfigServer Security and Firewall (CSF) on your Linux server? You came to the right place.
Follow our guide below to help better understand the CSF firewall, the benefits, and how to do it on your Linux server (with screenshots)! Let’s jump in…
Rest assured, if you just purchased a hoganhost VPS hosting package, your CSF firewall comes installed by default.
What Is A CSF Firewall?
ConfigServer Security and Firewall (CSF) is a free firewall application suite and configuration script providing an advanced firewall management interface for login, intrusion, and flood detection and controlling access to public services such as Secure Shell (SSH), Pop3, IMAP, SMTP, and others. CSF helps configure your Linux server’s firewall while using the additional security features to lock down or allow specific access to your server. It is usable via the command line or features UI integration with cPanel, DirectAdmin, or Webmin for Linux servers.
CSF firewall includes Login Failure Daemon (LFD) service, which watches for excessive user login failures common during brute force attacks. If it recognizes many of these failures from the same IP address, it temporarily blocks them from all services on the Linux server. Users can allow the blocks to expire automatically or manually remove them.
Benefits of Using a Firewall
Using a firewall provides many benefits, such as:
- Using firewall rules in monitoring traffic.
- Blocking IP addresses from malicious sources.
- Allowing IP addresses from trusted sources.
- Controlling server entry points to prevent malicious attacks.
- Create a private hosting environment, keeping data safe.
Though it is not the only method, a firewall is vital to your Linux server security. A firewall acts as the first line of defense between your server environment and malicious traffic trying to access it. It helps prevent unauthorized access by monitoring incoming and outgoing traffic and blocking those not meeting your specified firewall rules.
You can configure the firewall rules to block IP addresses or domains, or allow IP addresses from trusted sources. Blocking or allowing IP addresses helps mitigate the risk of cyberattacks, keeping network access and sensitive data secure.
Firewalls also serve to secure SSH connections. While it is used to connect to remote systems securely, it can prove vulnerable if security measures are not adequately implemented.
In addition to changing the SSH port from the default, using the configured firewall CSF provides to monitor traffic over SSH prevents potential threats before they happen.
CSF Firewall Features
Port Flood Protection: Protects Denial of Service (DoS) attacks and other port flood attacks. Use it to specify the number of connections permitted on each port during a chosen period. It is advised to enable this option because it might stop an attacker from shutting down your services. Use caution with restrictions since excessively severe settings will cause regular clients to lose connections, but lax controls could enable successful flood attacks.
Port Knocking: Allows clients to establish connections on a server without open ports. The server lets clients connect to the main ports only after a successful port knock sequence. You may find this helpful if you offer services available to only a limited audience.
Port or IP Address Redirection: Allows configuring CSF to redirect connections from one IP address or port to another. It is worth noting that after redirection, the client’s source address will be the server’s IP address. However, this is not equal to Network Address Translation (NAT).
IP Address Block Lists: Allows CSF to automatically download lists of blocked IP addresses from the sources you define.
User Interface (UI) Integration: CSF offers UI integration for cPanel, DirectAdmin, and Webmin in addition to the command line interface. This feature may be helpful if you are unfamiliar with the Linux command line.
Login Authentication Failure Daemon: CSF checks logs for failed login attempts at regular intervals and recognizes most unauthorized attempts to gain access to Linux servers. From the configuration file, you define the desired action CSF takes after a specified number of attempts. In addition, you can define your login files with regular expression matching. This feature is helpful if you have an application that logs failed logins but blocks the user after a specific number of attempts.
Connection Limit Protection: This feature limits the number of concurrent active connections from an IP address to each port. It can prevent server abuses, such as DoS attacks, when properly configured.
Process Tracking: Tracks processes to detect suspicious processes or open network ports and emails the system administrator if any are detected. This feature helps you to identify and stop a possible exploit on your virtual private server (VPS).
Messenger Service: Allows CSF to send more informative messages to clients when a block is applied. While enabling it provides more information to the client, the additional info may make it easier for an attacker to flood your VPS.
Directory Watching: Monitors the /temp directory and other relevant folders for malicious scripts and emails the system administrator when one is detected.
Prerequisites to Install CSF Firewall
Here are some of the necessities to install and configure CSF:
- A server running Linux. This tutorial runs AlmaLinux 8.
- Root privileges for your Linux server. For this tutorial, the root login is through Web Host Manager (WHM).
- An installed SSH client.
Install and Configure CSF
CSF Installation
Step 1: Login as Root
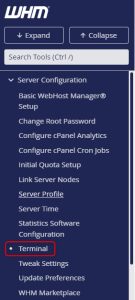
Log into your Linux server as root. For this tutorial, the root login is via WHM. Once logged in, access the terminal from the Server Configuration section.
Step 2: Navigate to the Root Directory
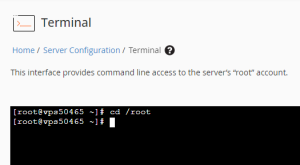
Run the following command from the terminal to ensure you are in the root directory. The system will show the main prompt if you are already in the root directory.
|
1
|
cd /root |
Here is what the output looks like:
Step 3: Download CSF Firewall
Download CSF by running the following command.
Here is what the output looks like:

Step 4: Decompress the Downloaded CSF Firewall File
Decompress the downloaded CSF file with the following command:
|
1
|
tar -xzf csf.tgz |
Running the command returns you to the main prompt.
Step 5: Navigate to the CSF Directory
Use the following command to switch to the CSF directory:
|
1
|
cd csf |

Step 6: Install CSF Firewall
Install CSF by running the following command:
|
1
|
./install.cpanel.sh |
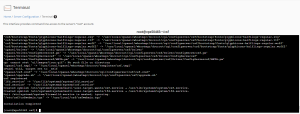
There will be a lengthy output appearing as follows:
Step 7: CSF Configuration
Configuring the CSF firewall is made simple on Linux servers via WHM. Changes made from the UI update your configuration file, making the process straightforward.
Use the ConfigServer Security & Firewall interface in WHM by navigating to WHM » Home » Plugins » ConfigServer Security & Firewall.

While the installation script should enable the correct ports in CSF, the best practice is that you confirm this on your Linux server.
In addition to setting up a custom CSF firewall configuration, you have the ability to apply pre-configured csf.conf profiles and backup and restore csf.conf profiles you create.
To apply a pre-configured CSF profile, scroll down to the csf-ConfigServer Firewall section and click Firewall Profiles.
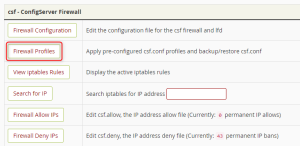
From here, select the radio button next to the profile you wish to configure and click Apply Profile.
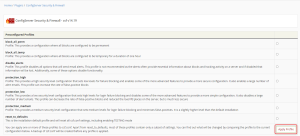
Once the CSF configuration file updates, you must restart the CSF service. Click the Restart csf+lfd button.
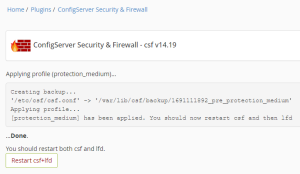
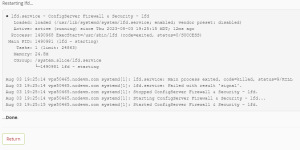
After restarting CSF, click Return to go back to the main ConfigServer Security & Firewall page.
Step 9: Disable CSF Testing Mode
You must disable Testing Mode once you configure CSF. To do so, follow these steps:
- Click the csf tab.

- Under the csf – ConfigServer Firewall section, click Firewall Configuration.
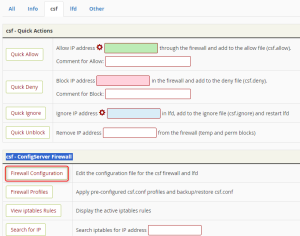
- Click Off next to Testing.
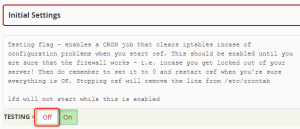
- Click Restart csf+lfd. It may take a while, but allow the process to run. If the page does not reload after a few minutes, click Return to go back to the ConfigServer Security & Firewall page.
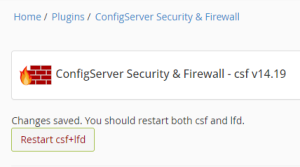
- A green message displays that the CSF firewall is enabled and running.

Conclusion
Installing the CSF firewall is vital to securing your server against potential cybersecurity threats. Following the steps outlined in this tutorial ensures your server is protected. You also enjoy the many features CSF offers, including using your control panel UI for directly updating the configuration file.
While your firewall configuration may vary, having the tool in place gives your Linux server a fighting chance against malicious attacks. Remember to keep the firewall up-to-date and regularly test the firewall rules for lasting functionality.
Check out our cheap and reliable web hosting

![How to Install cPanel on CentOS 7 [step-by-step 2021guide]](https://hoganhost.com.ng/blog/wp-content/uploads/2021/01/Install-cPanel-1024x536-1.png)
