Blogger is a great free tool for those just getting started online.
But, if you’re starting to take your online efforts seriously, then you’re probably going to run up against the limitations of the platform rather quickly.
If you’ve made the decision to switch from Blogger to WordPress, then you probably don’t want to lose all of the content you’ve created thus far. That’s exactly why we created this guide.
Read on to learn how to switch from Blogger to your new self-hosted WordPress site.
Step 0. Before You Start
To get started with WordPress, you would need a domain name and web hosting (CHECK OUT HOGANHOST HOSTING PLANS).
For a quick primer, a domain name is your website’s address that people type to get to your blog, and web hosting is where your website files are stored. Both of these are a MUST HAVE to create any type of blog / website.
Once you have signed up for WordPress hosting and set up your domain name, the next step is to install WordPress on your hosting account (GUILD TO INSTALL WORDPESS).
Step 1. Export Your Blogger Blog
The first thing you need to do is export your Blogger blog’s content. You can do this by logging into your Blogger dashboard and going to Settings » Other page. Under the ‘Import & back up’ section, you need to click on the ‘Back up Content’ button.
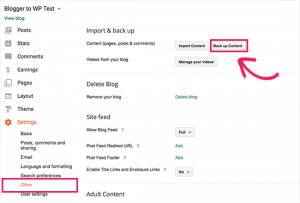
This will bring up a popup where you need to click on the ‘Save to your computer’ button.
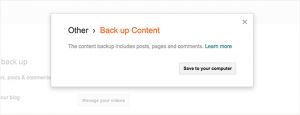
Your Blogger blog’s content will be downloaded to your computer in an XML file. Once the download is complete, it is time to import your Blogger content into your WordPress site.
Step 2. Import Blogger to WordPress
To start importing your Blogger site into WordPress, you need to login to your WordPress admin area and visit Tools » Import. On the Import page, go ahead and click on the ‘Install Now’ link below Blogger.
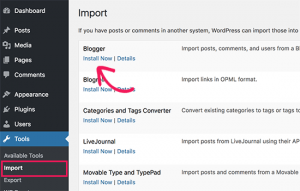
WordPress will now download and install the Blogger Importer plugin for you. Once it is finished installing, you would need to click on the ‘Run Importer’ link to continue.
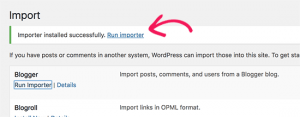
On the Import Blogger screen, WordPress will ask you to upload the XML file. This is the file that you downloaded in Step 1.
Simply click on the choose file button and upload the XML file you downloaded earlier. Next, you need to click on the Upload file and import button to continue.
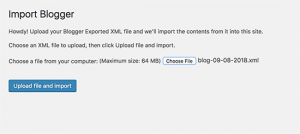
WordPress will now upload the import file. If your import file is too large, then you may see an error that your file size is too large. In this case, you would need to increase your maximum file upload limit. If your file is small, then you won’t see any errors.
Next, you will be asked to assign posts to an author. If you had multiple authors on your Blogger blog, then you can create a new user account for each author. You can also assign these posts to existing authors on your WordPress site.
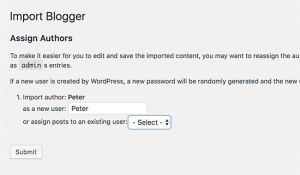
After making your selection, click on the submit button to continue.
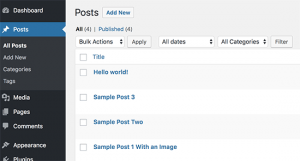
WordPress will now import all content from the Blogger export file to your WordPress site. You can view the content by visiting Posts » All Posts page.
Step 3. Setting up Permalinks
Permalinks is the term used for URL structure of individual pages. WordPress comes with a feature that allows you to set up SEO friendly URL structure. Since you are importing content from Blogger, you need your URL structure to be as close to your Blogger URL structure as possible.
To set permalinks, you need to go to Settings » Permalinks screen in your WordPress dashboard and choose the custom structure option. After that, you need to add the following text in the box next to the custom structure field (just has it being display on the image Below).
/%year%/%monthnum%/%postname%.html
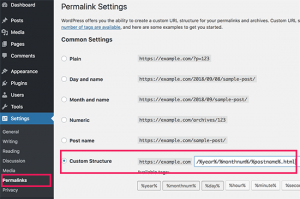
This permalink structure makes your blog posts URLs similar to the URLs on your old Blogger blog.
Note: if you are hosting with us and you are confuse, open a support ticket or contact us for more assistance

